
Instructions
In principle, this method can be applied to all tree varieties, but thin-barked varieties such as three-pointed maple, field maple, hornbeam, copper beech or rein tree work particularly well. While it can take around 20-30 years to grow a tree from just one seedling (it takes even longer in the tray), with fusion you can achieve an attractive result after just five to seven years.
Step 1
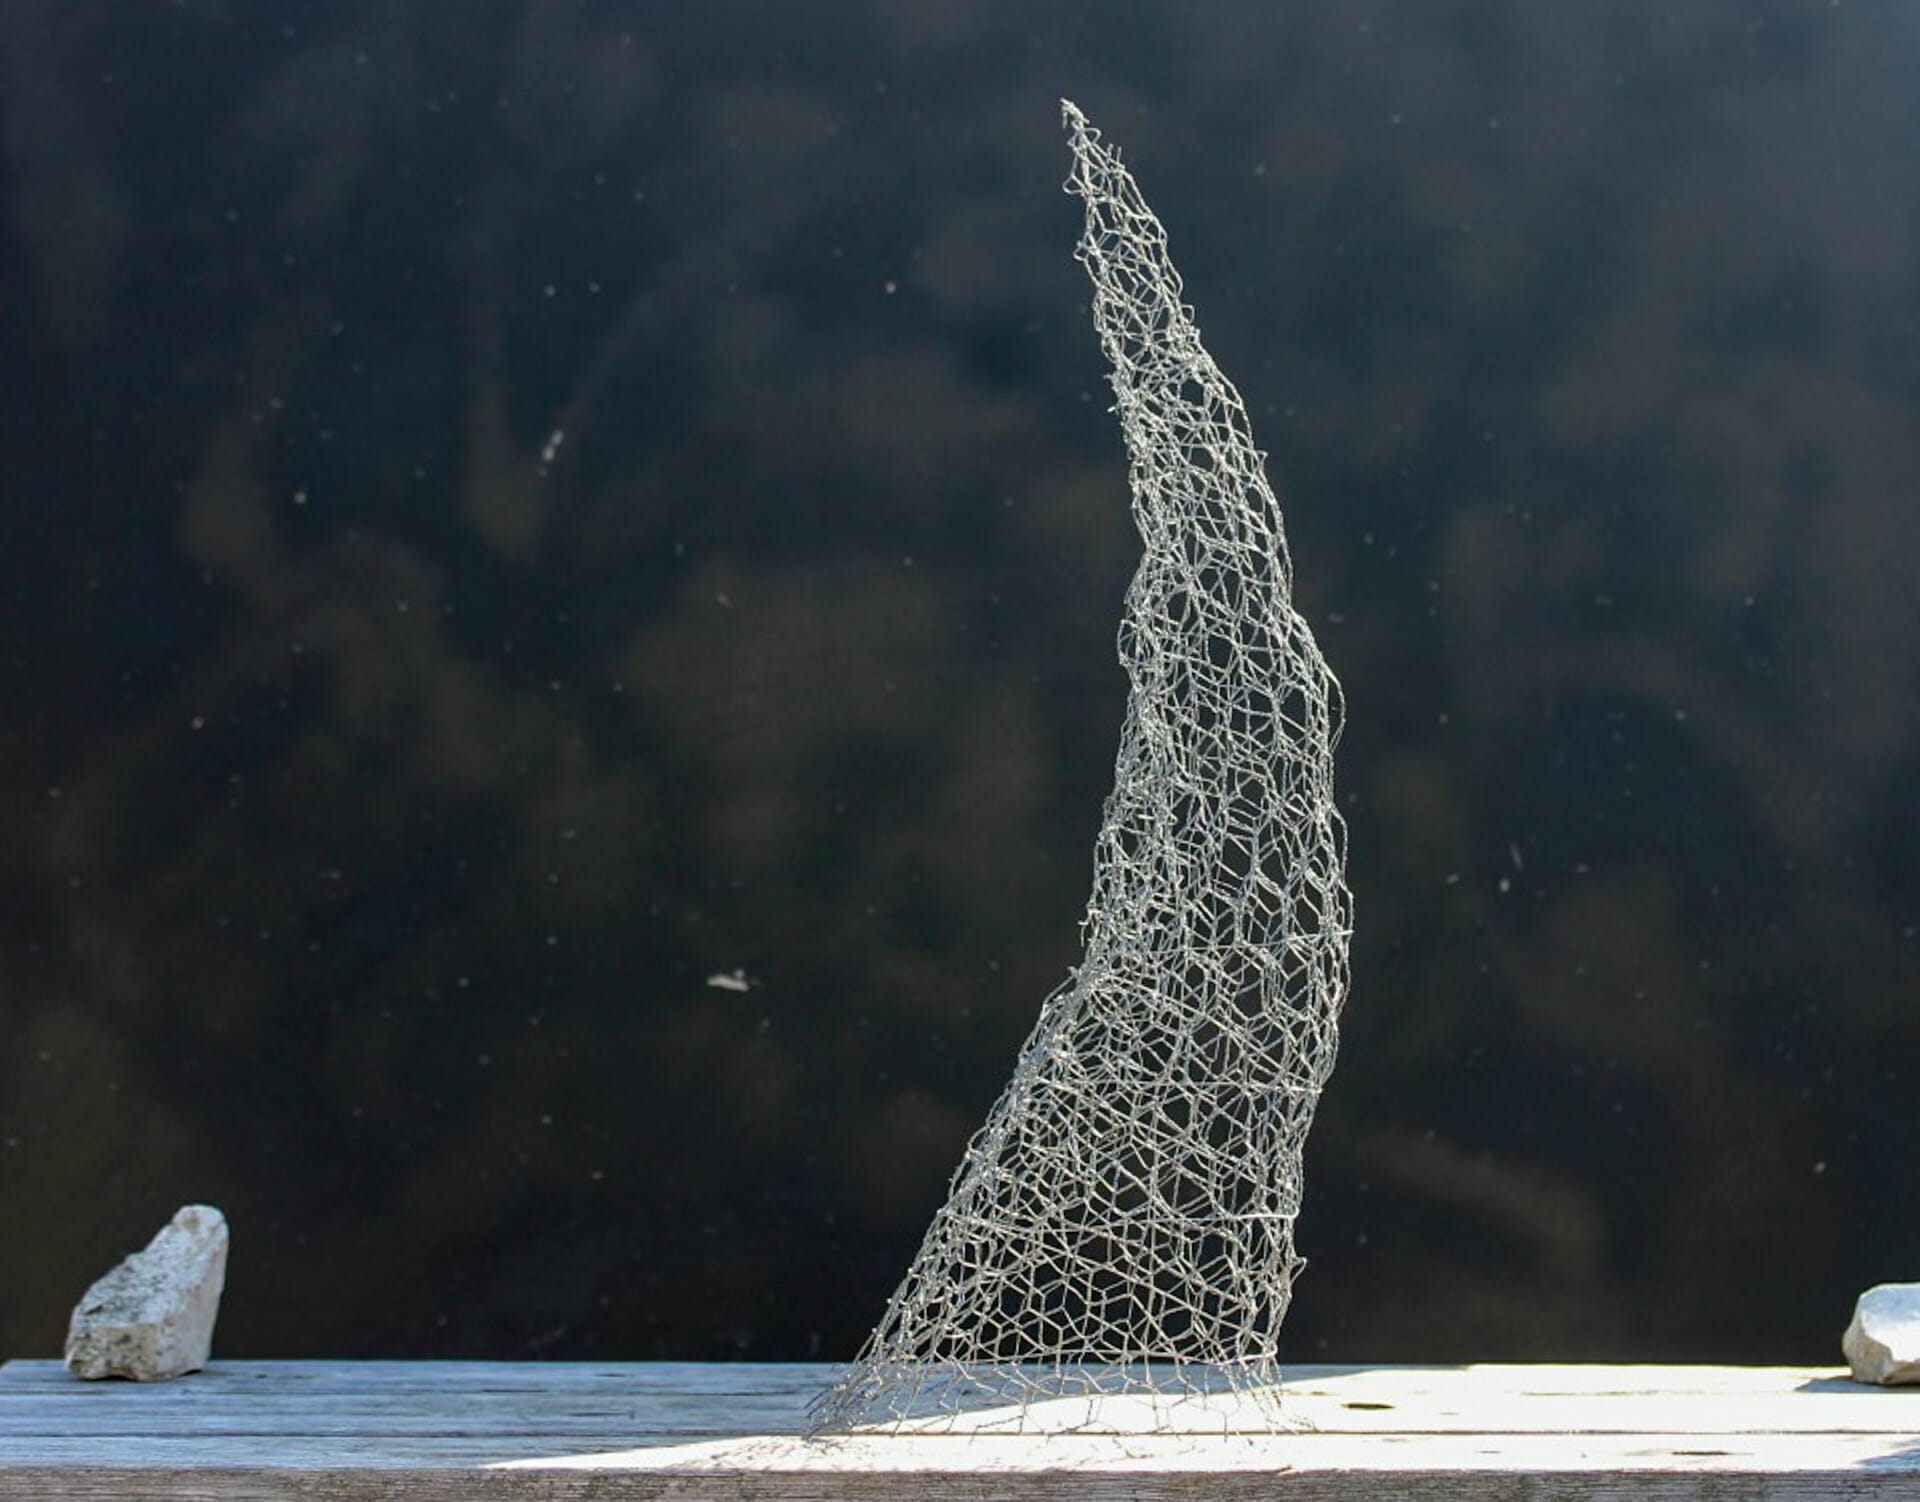
We use a solid iron grid as a base, which we bend into the shape of the future trunk. We can fix the individual seedlings particularly well in this grid.

Step 2
For our trellis, we need a flat and stable base, as well as wire to secure the seedlings to the trellis.

Step 3
Seedlings with a diameter of approx. 5 mm are ideal for our purposes. They have grown sufficiently and are still flexible. We need approx. 100-150 seedlings for our fusion project.

Step 4
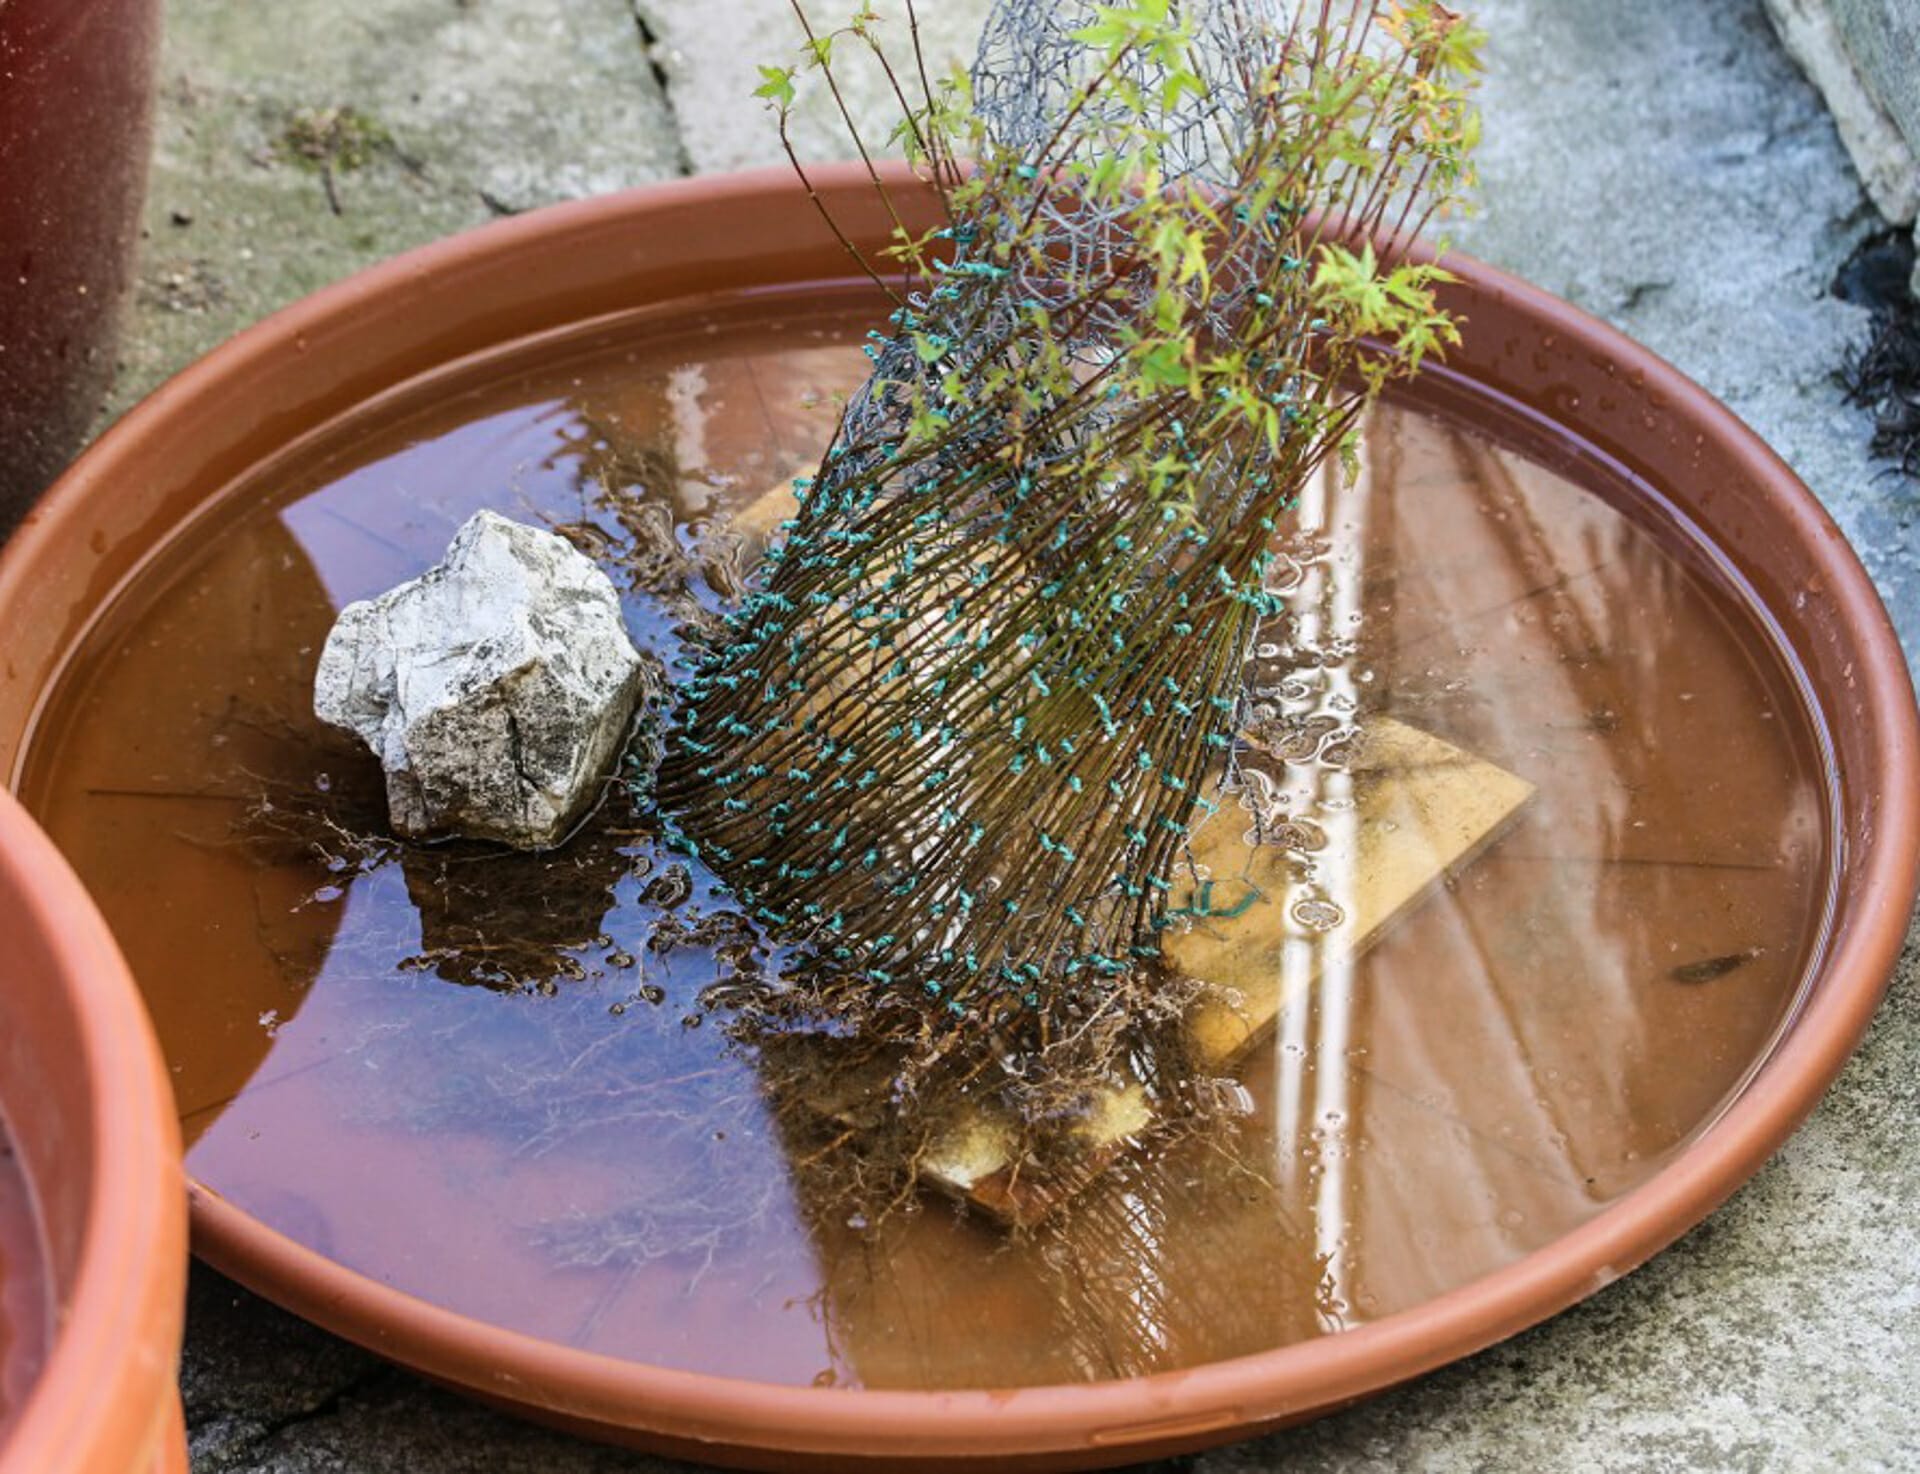
The seedlings are tied close together on the trellis. It is important to always maintain a spiral shape in order to obtain a homogeneous stem surface later on. When the seedlings increase in size, it is time to remove the fastening wires. After about three to four months, the seedlings will hold on to the trellis by themselves.

Step 5
Raising the seedlings on the trellis is a time-consuming task that can take a whole day. A water bath can be helpful to prevent drying out right from the start.
Step 6
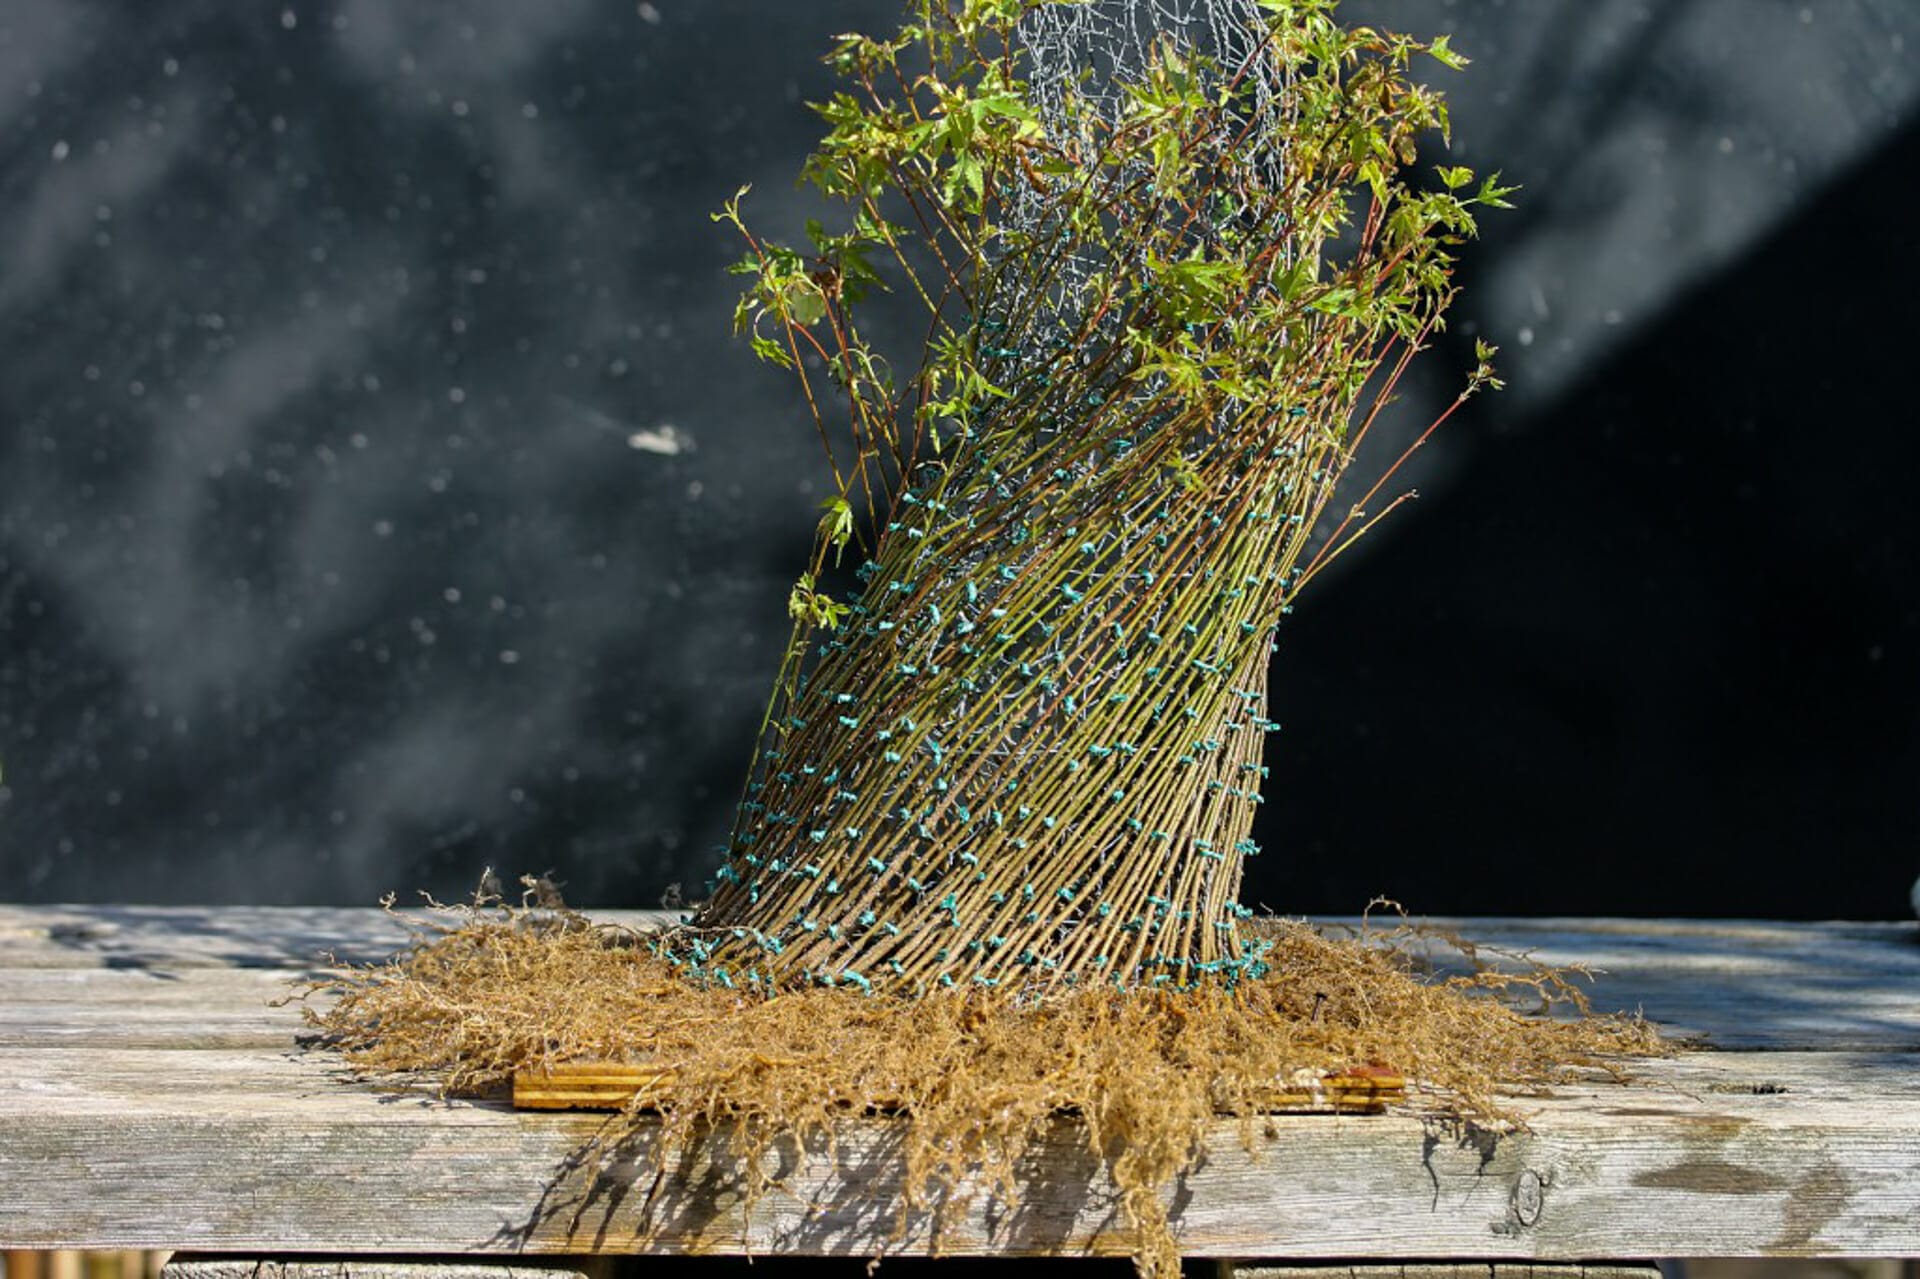
In our 6. 6) 6) example, the start of the stem is now formed and a fairly broad root system has developed. In our example, we used 120 seedlings and invested around 8 to 9 hours of work.

Step 7
It now takes about a year for the first seedlings to reach the top of our trellis trunk. During this time, our tree slice must remain in the tray.

Step 8
This picture was taken in August. Important: We must not prune the tree slice now, because the seedlings must continue to grow and, above all, increase in size.

Step 9
By the following spring, the seedlings had already grown to the top. We have already removed the fastening wires and fixed the trunk with rubber bands. The individual seedlings have not yet grown together, but the root ball is already a solid unit. At this point, our tree is ready for the open field.

Step 10
Now we plant the tree in the ground. Before burying the tree, we lay out a sheet of plastic so that the tree cannot form tap roots. Only shallow roots can form through the foil.

Step 11
When planting, it is important that the soil is loose. That's why we use garden soil, which we loosen up with peat and sand. Our tree now needs to be watered daily until the fall. This allows it to develop its roots in the top layer.


Step 12
next spring: the individual seedlings have now almost grown together and form the new trunk

