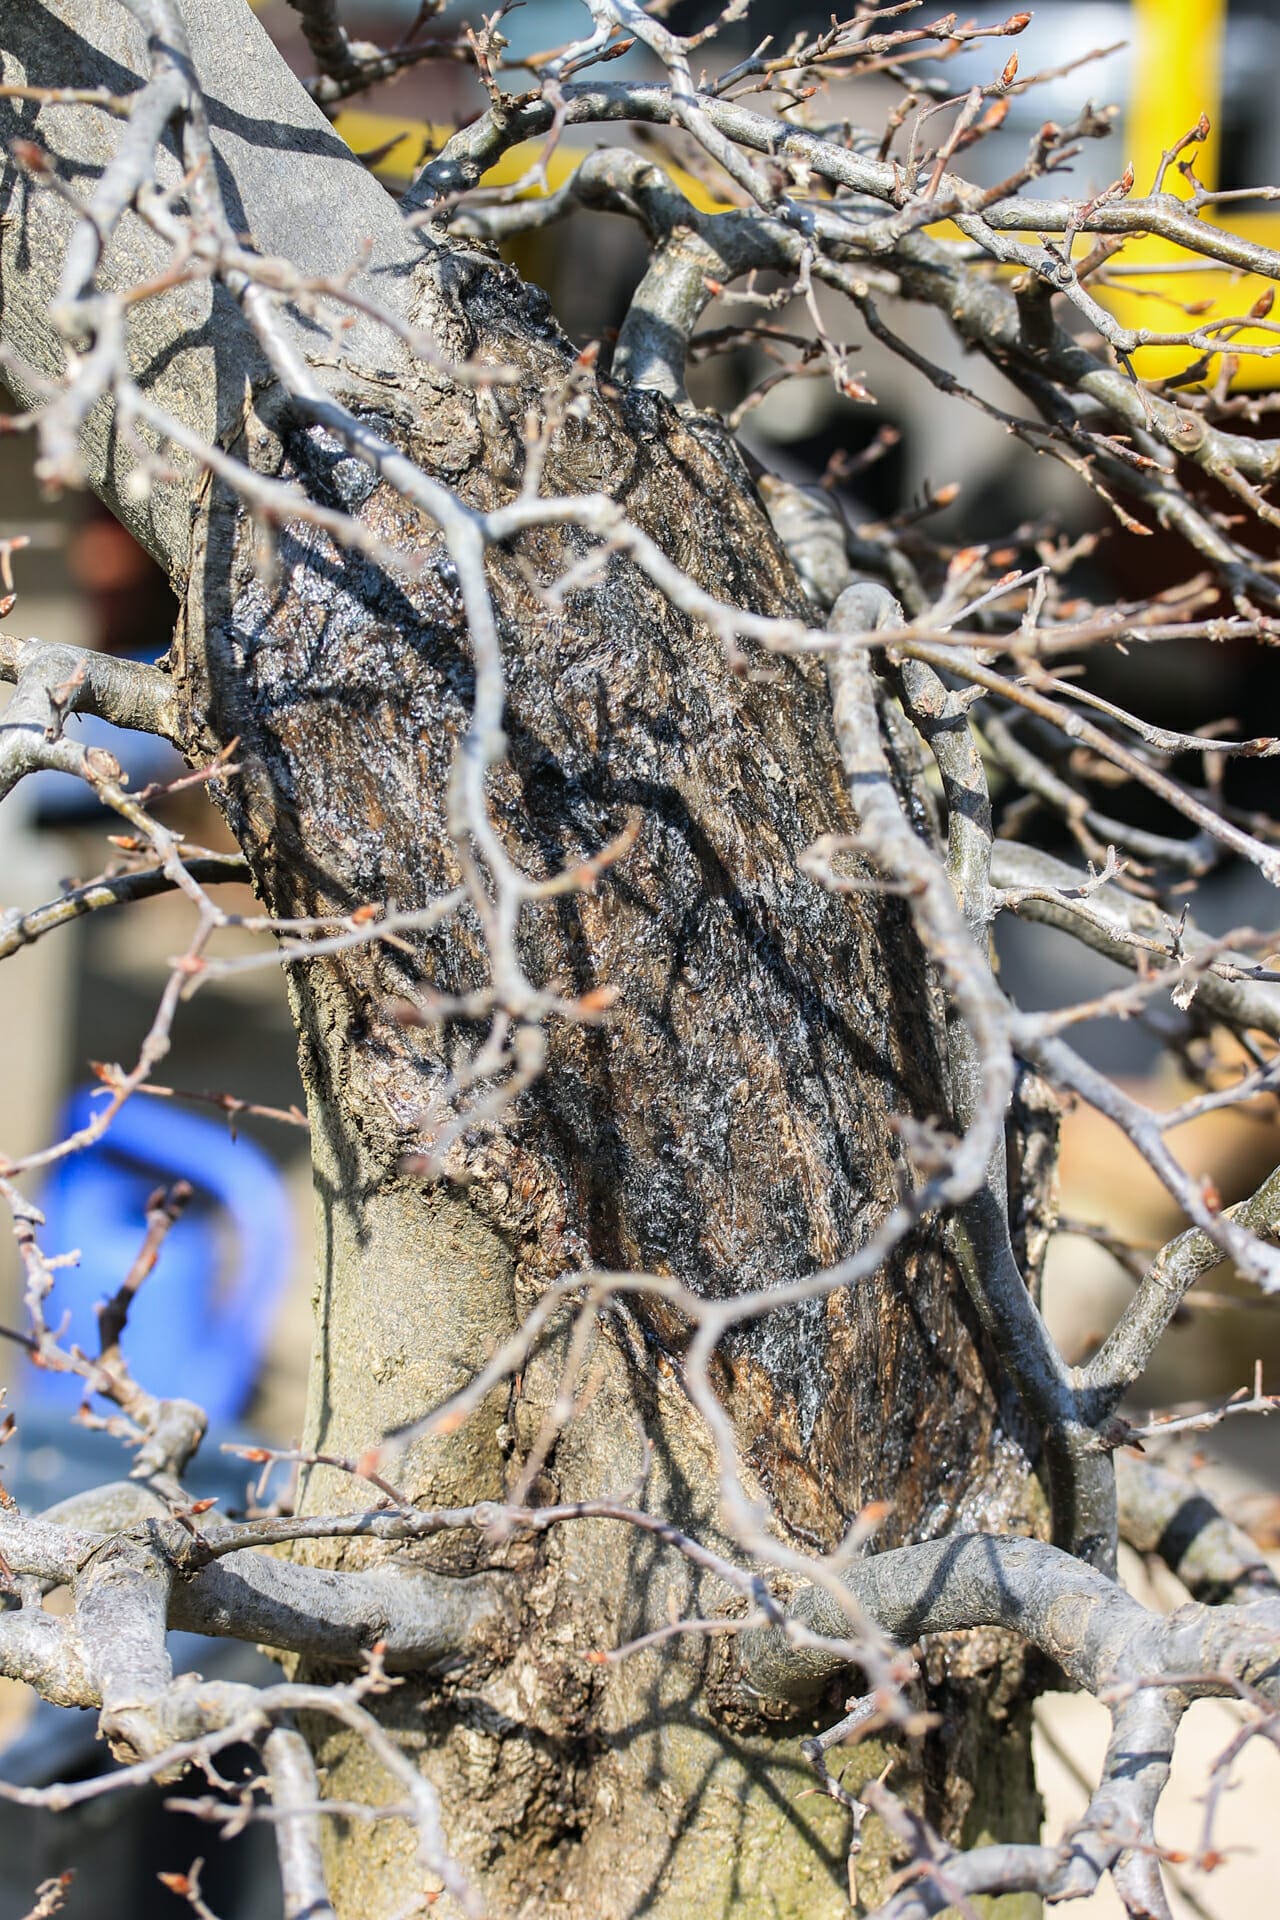
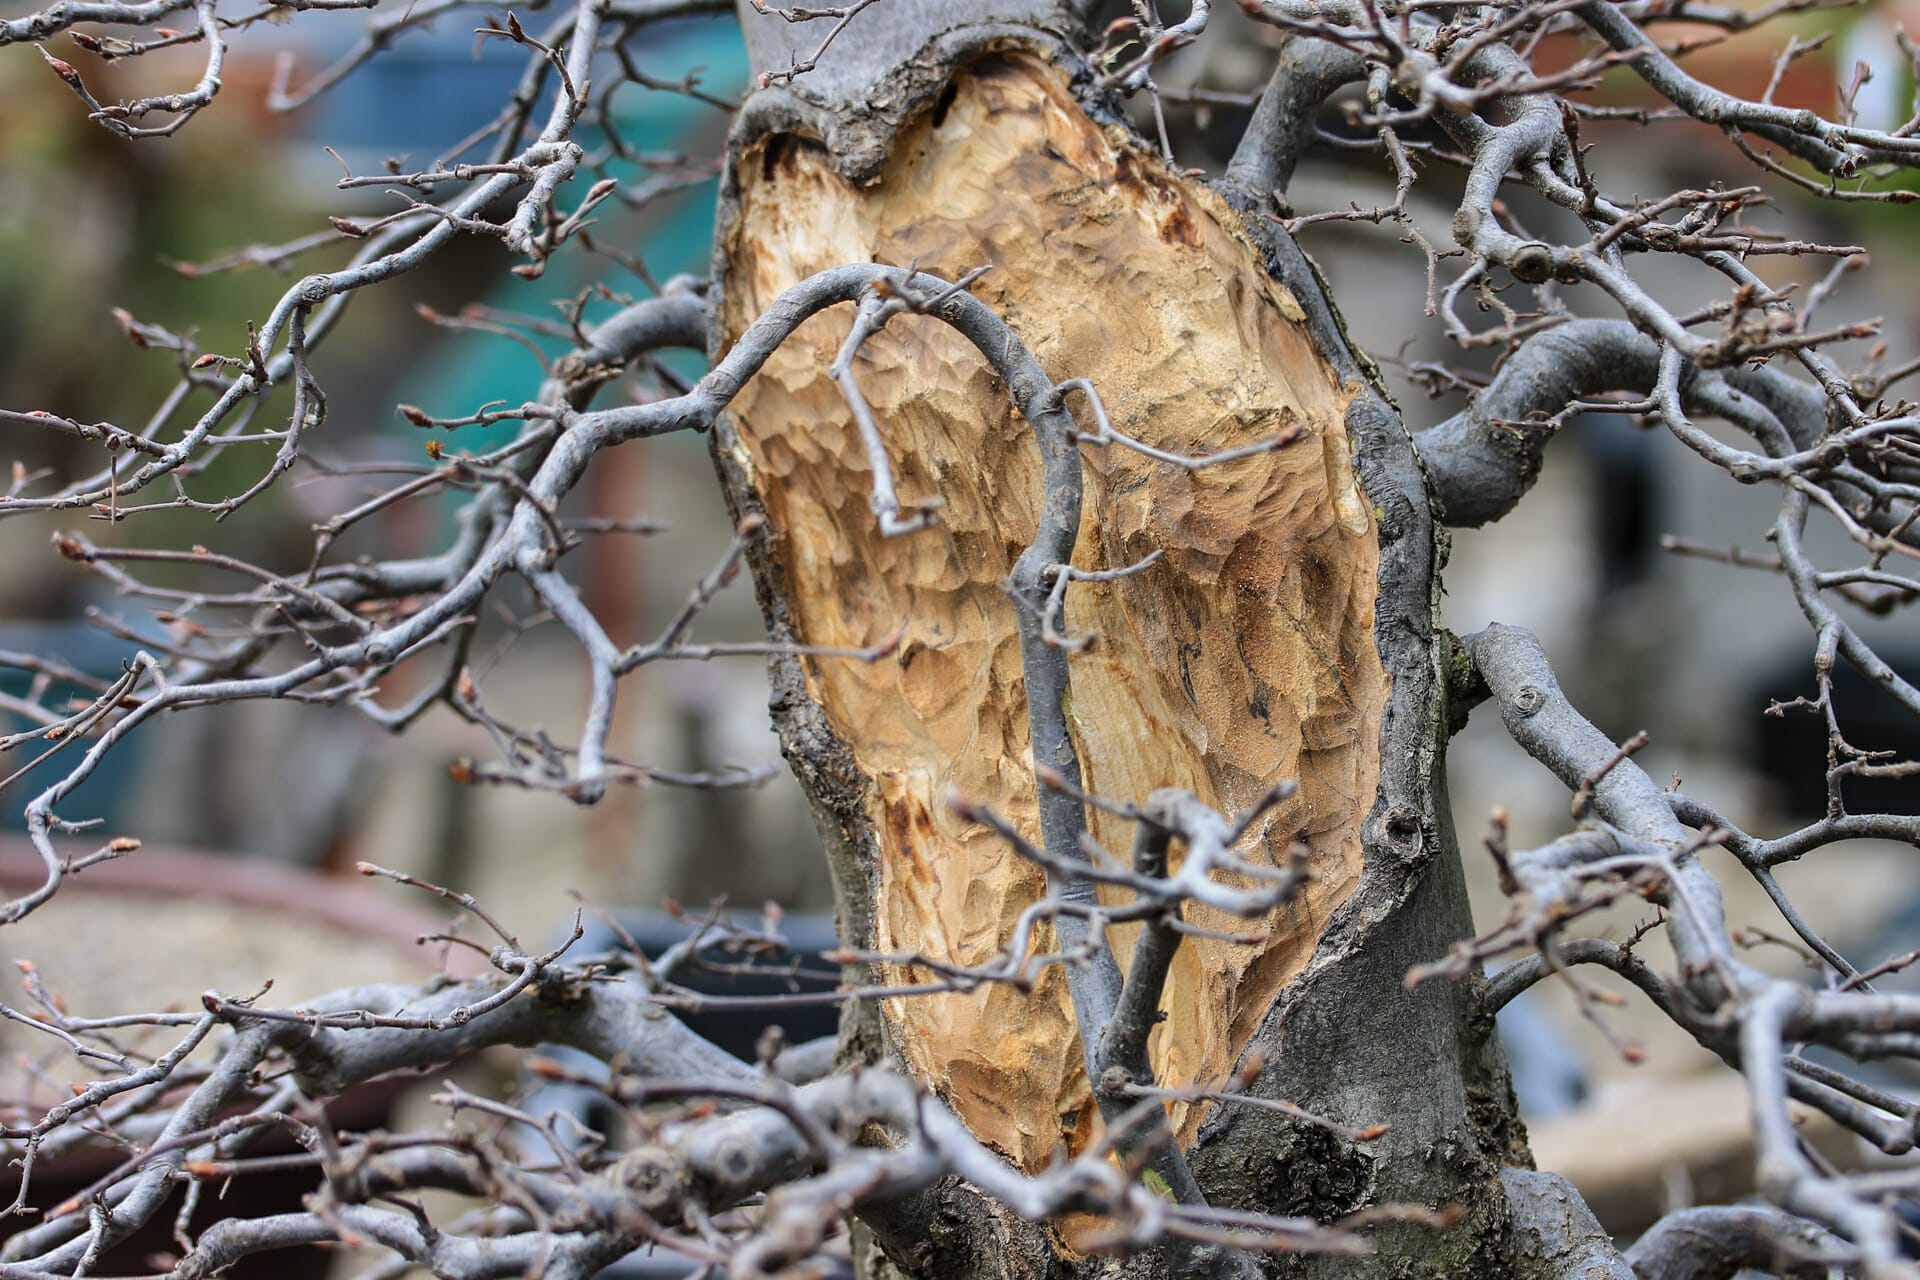
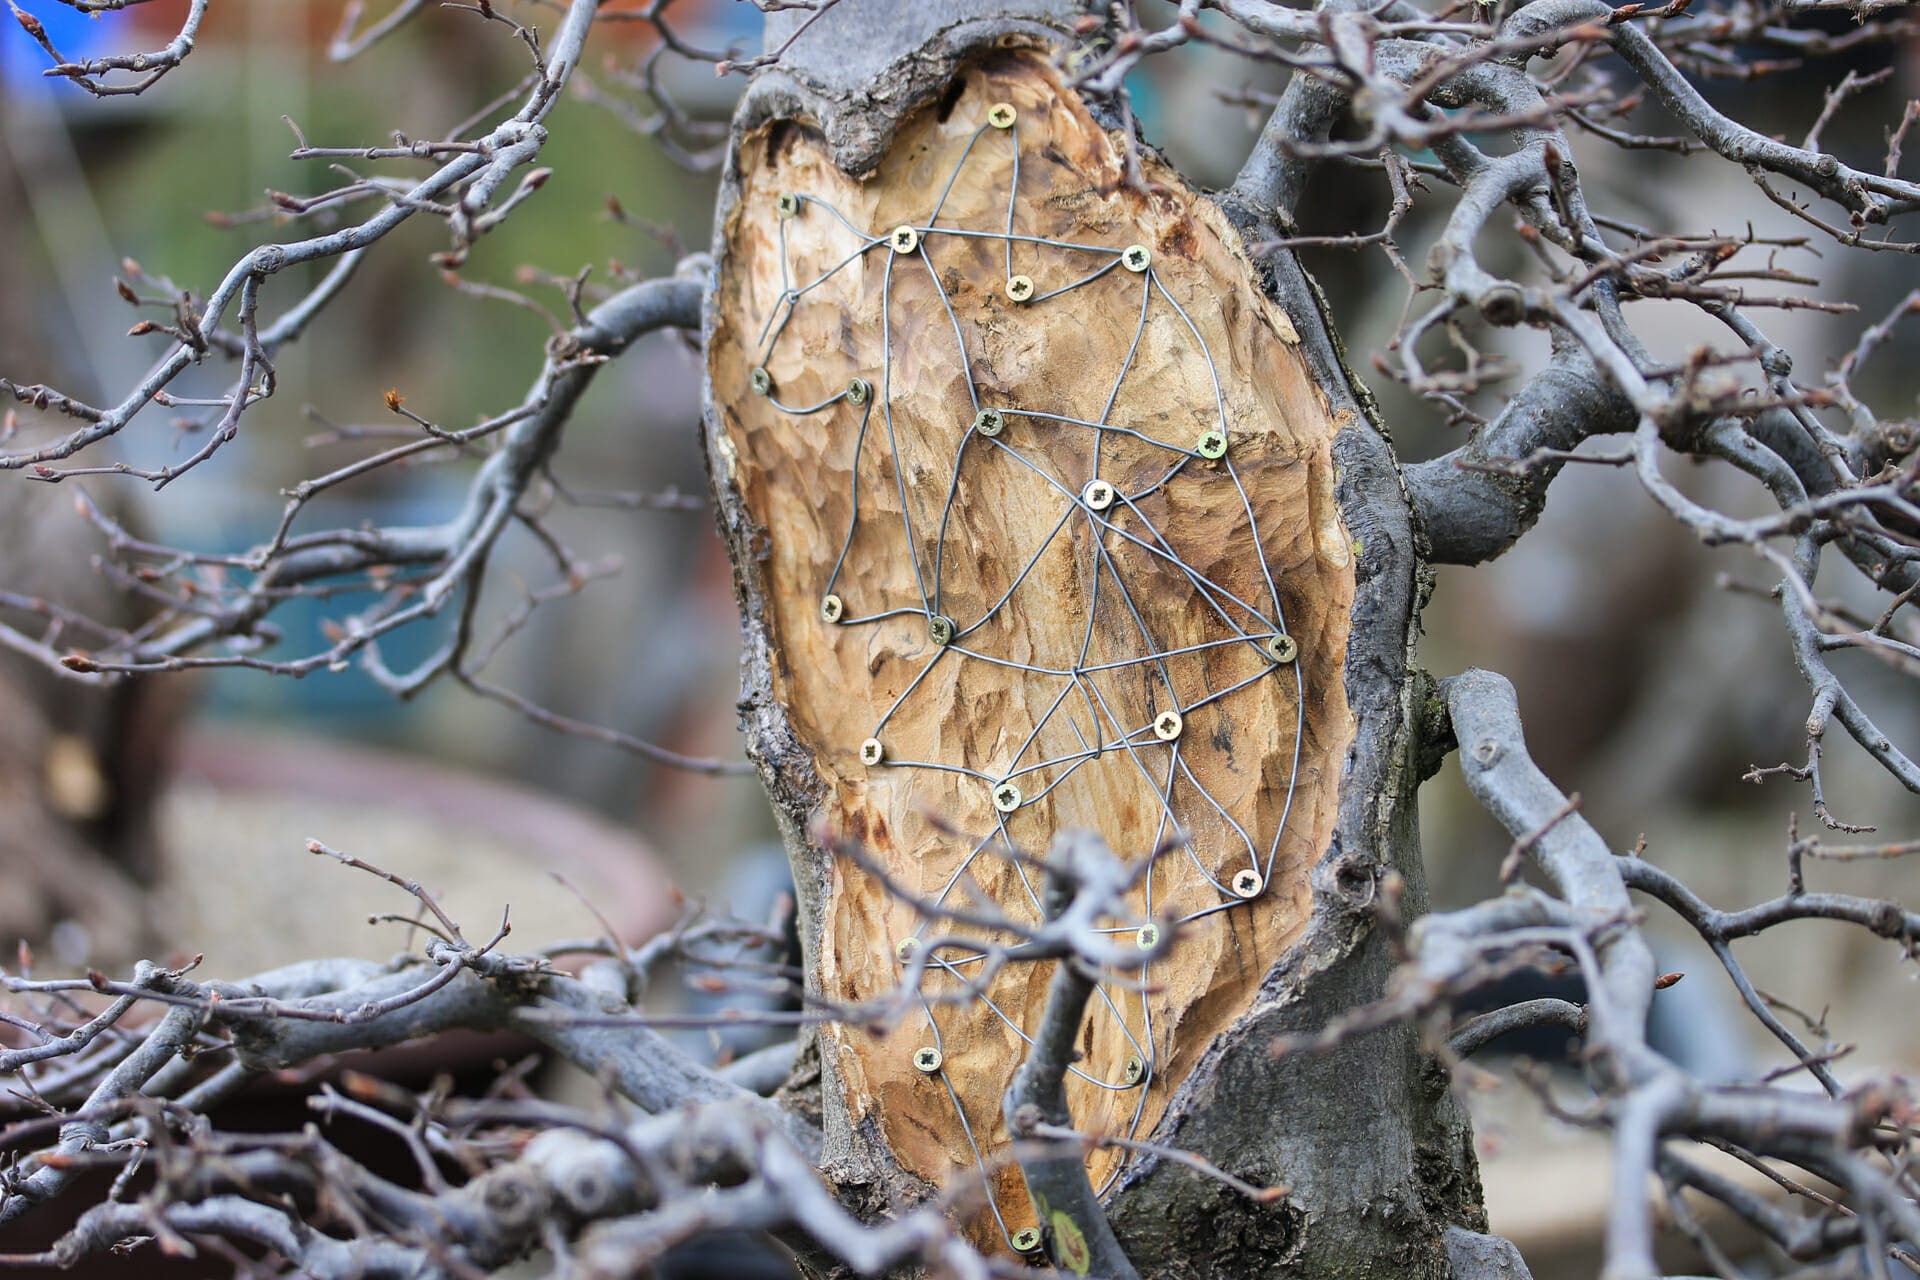
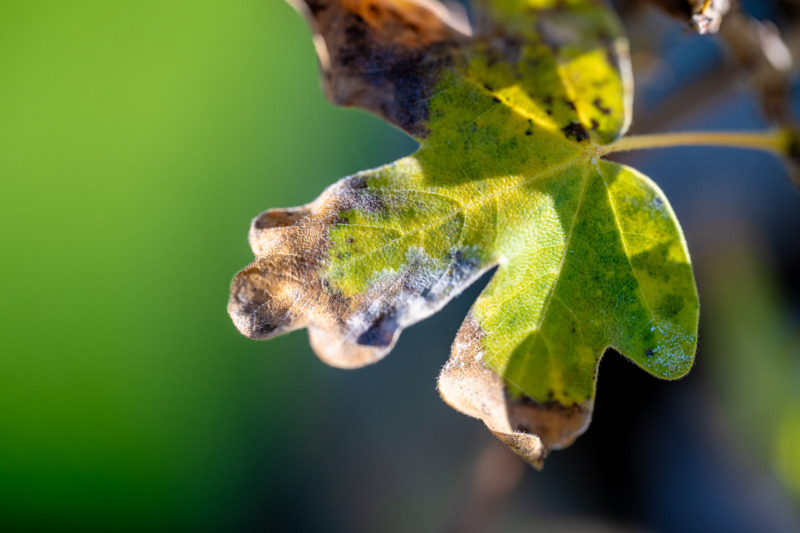
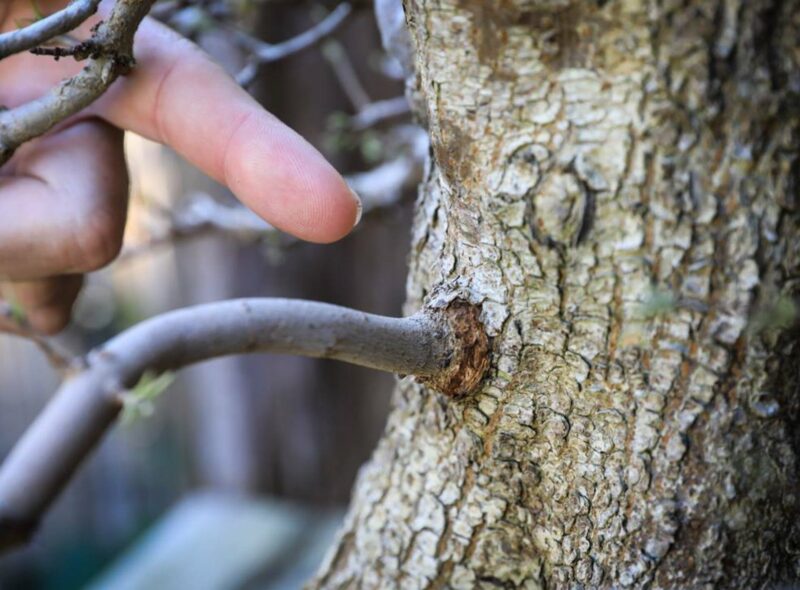
Wound treatment of large injuries in bonsai.

When working on a bonsai, large pruning wounds can sometimes remain. This is particularly common with yamadori. In such cases, you basically have two options: You can hollow out the tree and turn it into deadwood or you can close the wound professionally.

Categories

Bonsai care

Tags

Instructions

The callus is a problem with wounds of this type. It should actually form from the edge of the wounds and thus close the wound naturally. With large wounds, however, this does not work and the tree starts to rot relatively soon. Of course, such an open wound is also an open door for the penetration of fungal diseases, woodworms, wasp larvae and other pests. How long a tree can live well with an open wound or even a hollowed-out trunk depends on the variety. Hornbeam, copper beech, birch or apple tolerate a wound poorly and only last a short time. Maple, elm, lime, ash or cornelian cherry are the more robust representatives in such a case and tolerate a large wound better or for longer. 
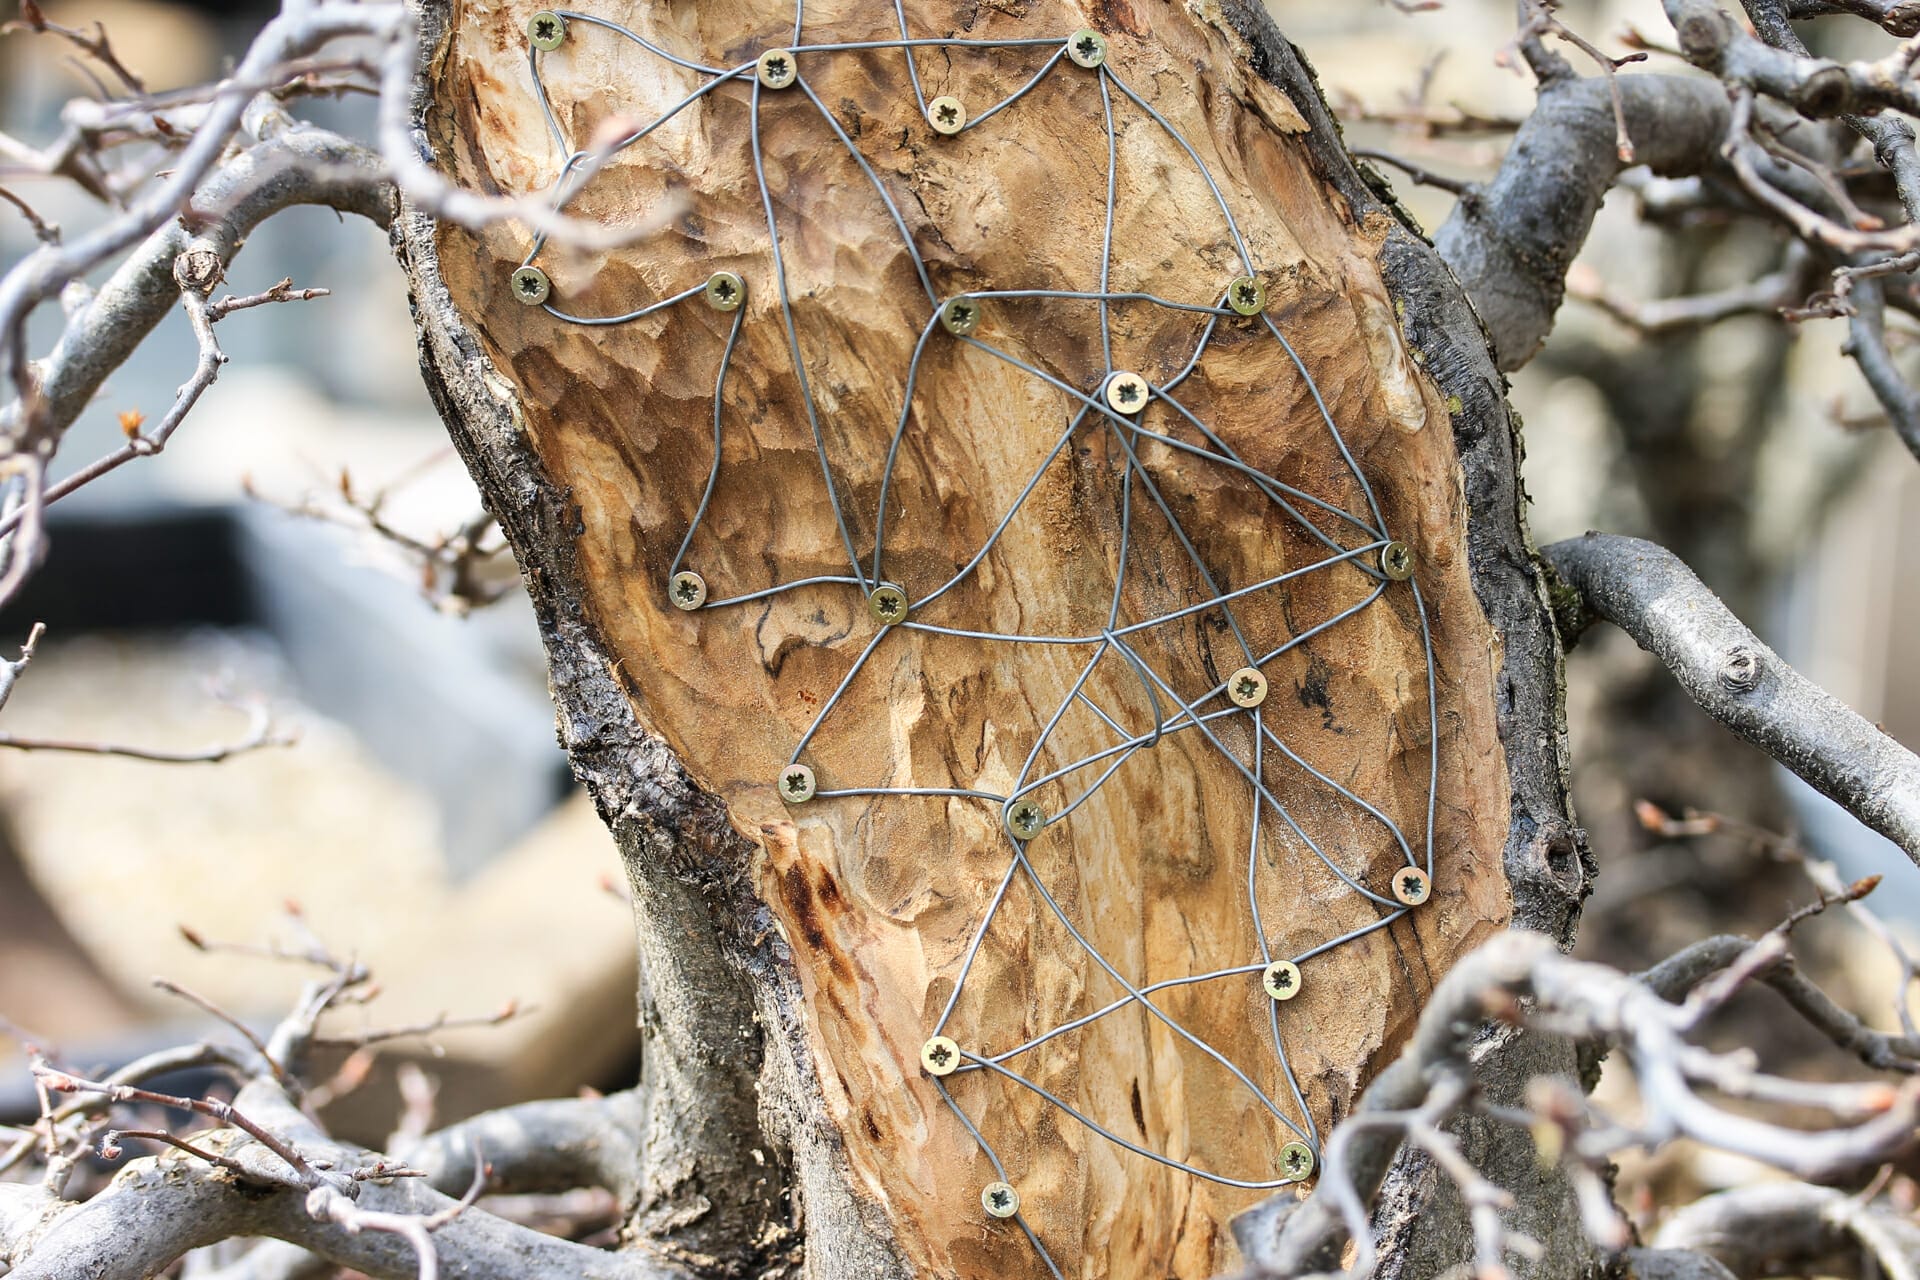
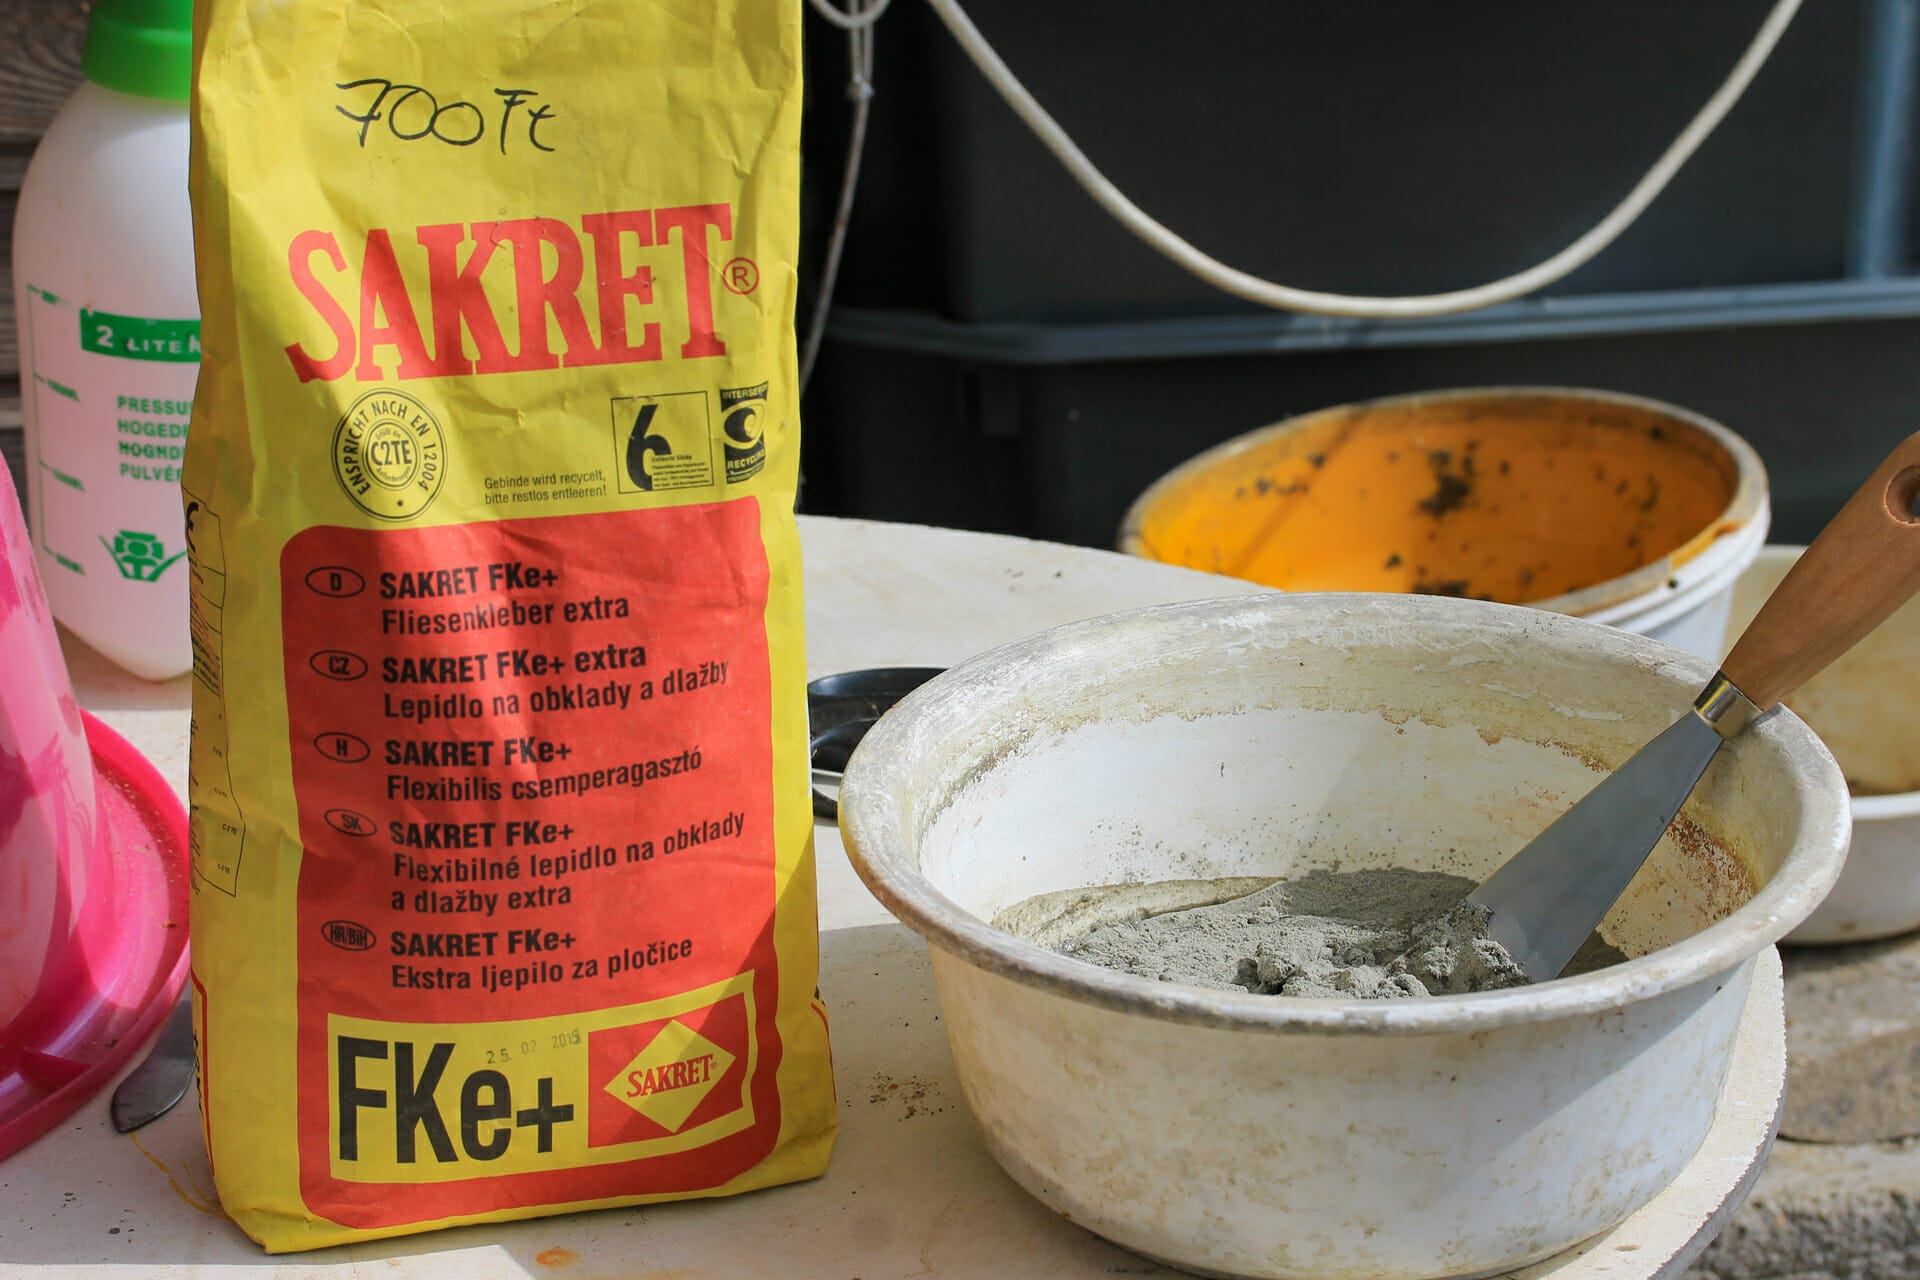
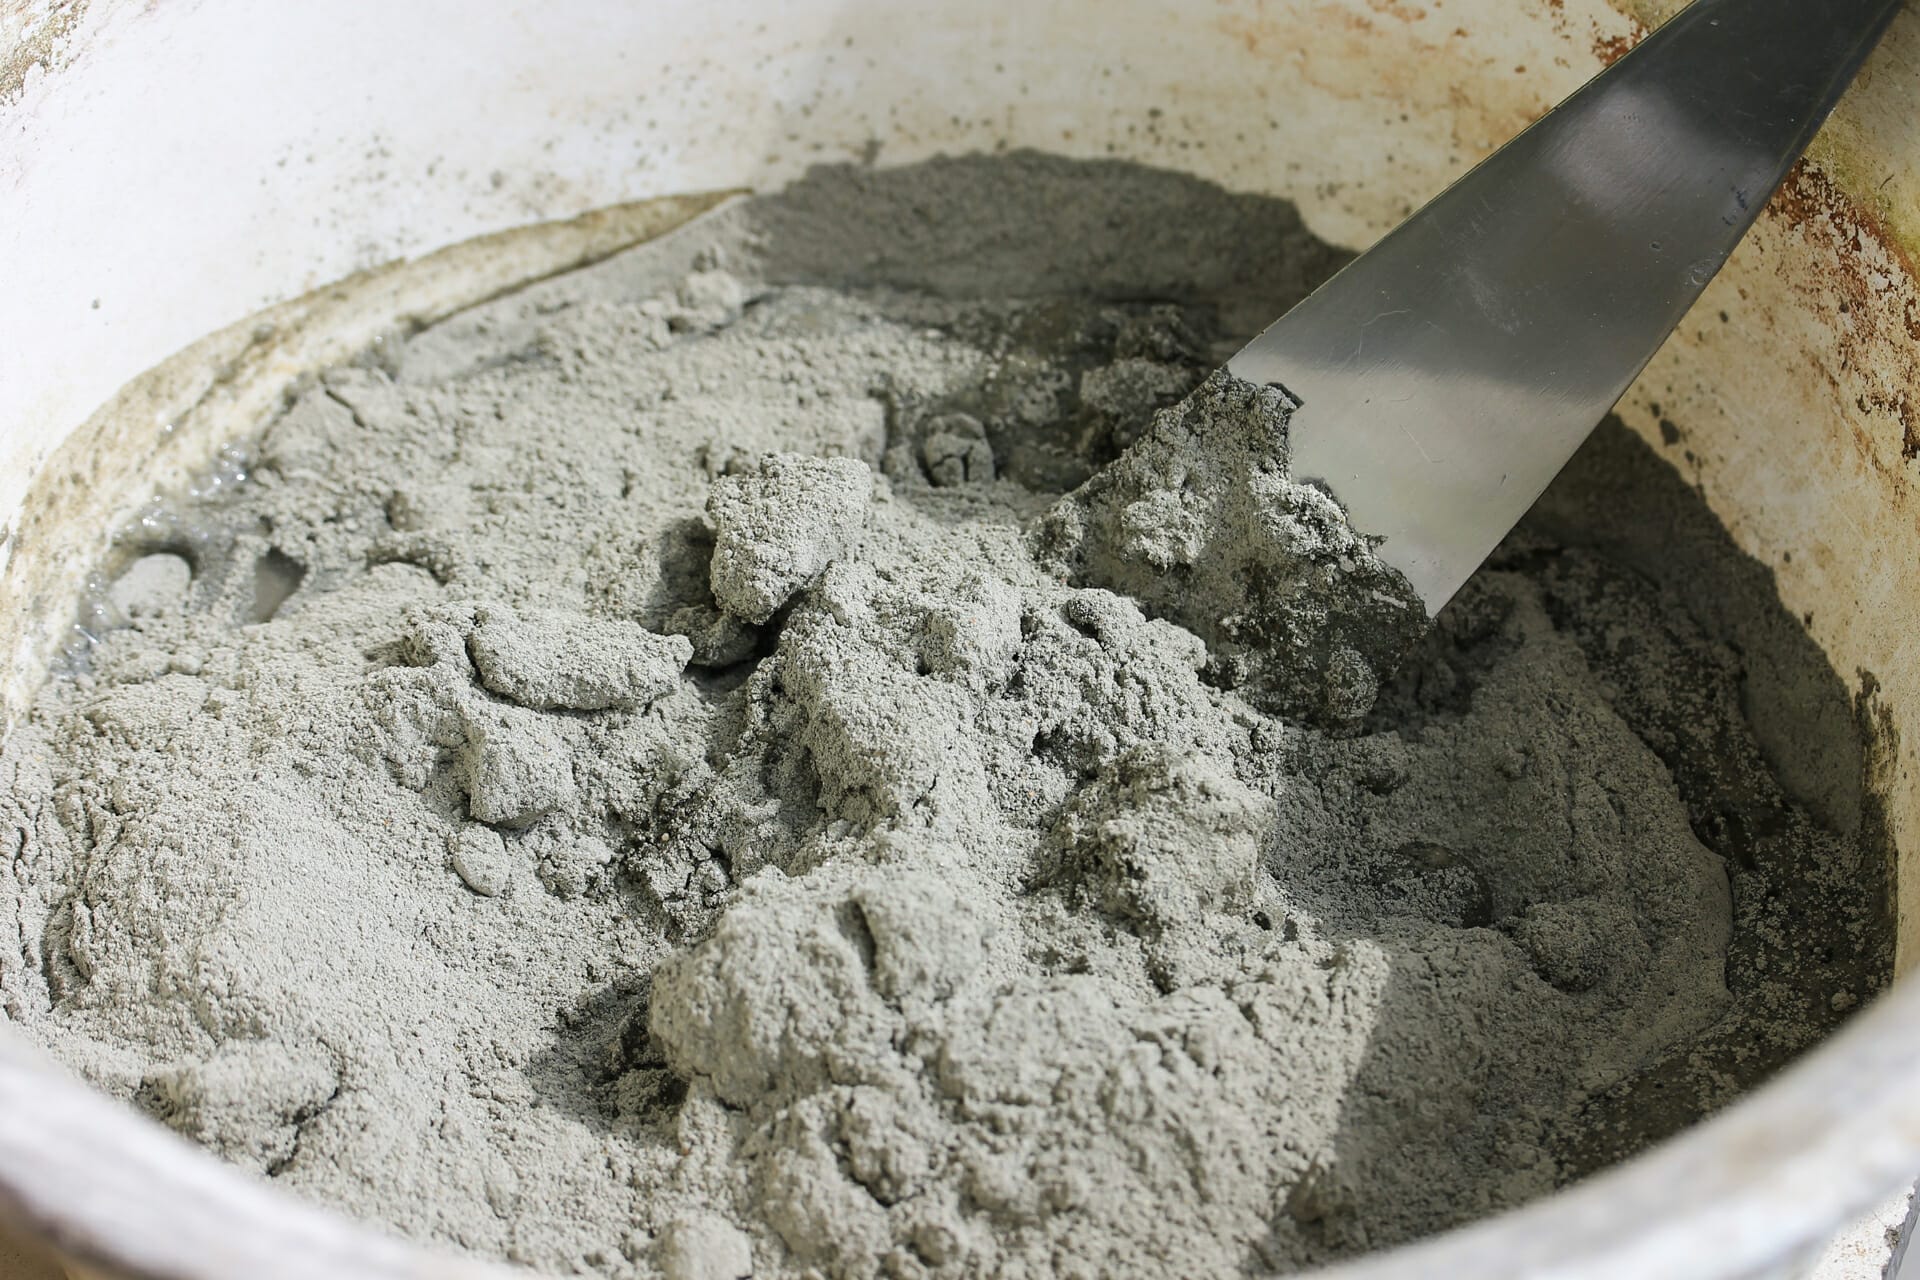
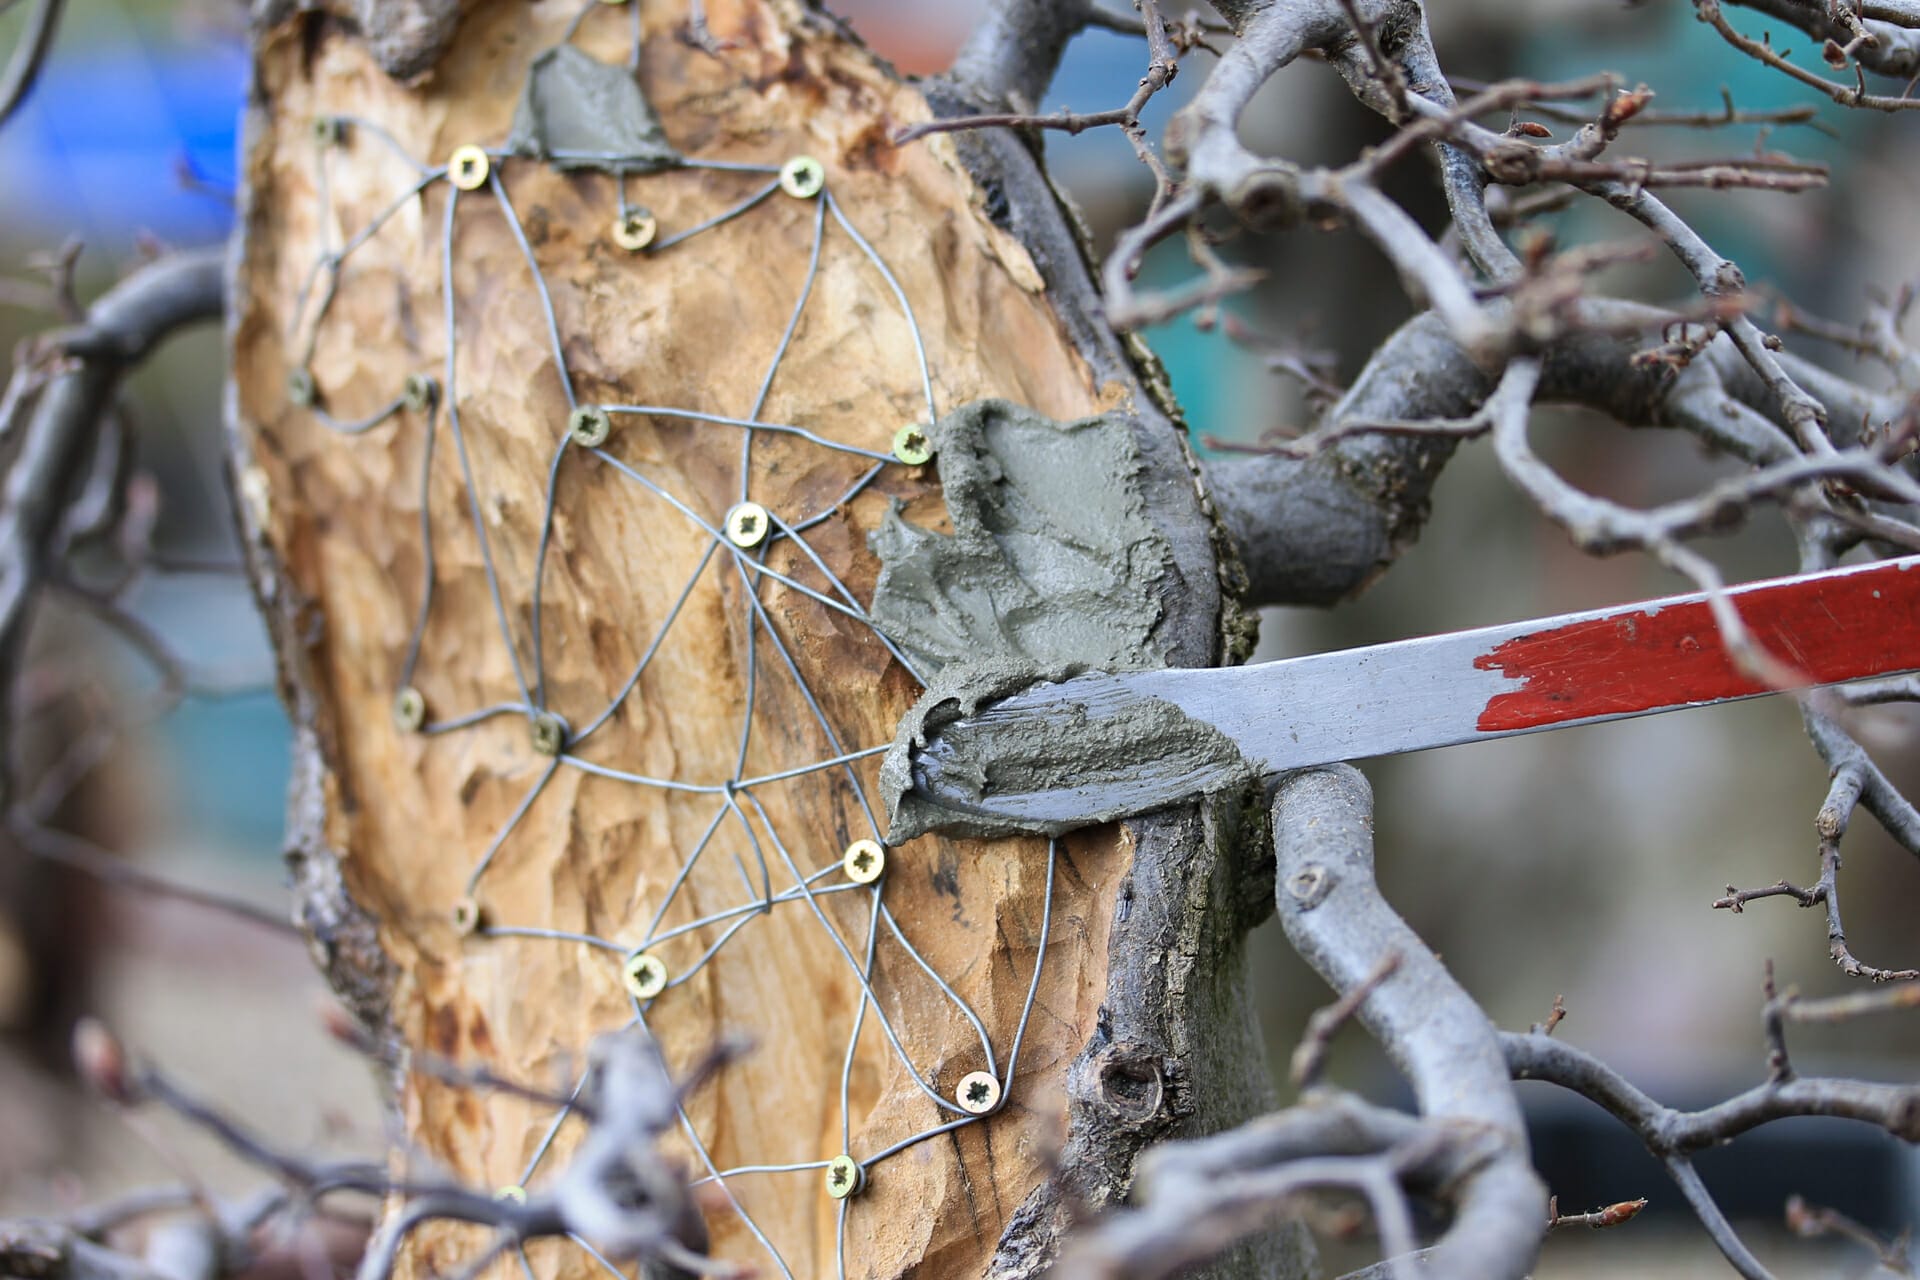
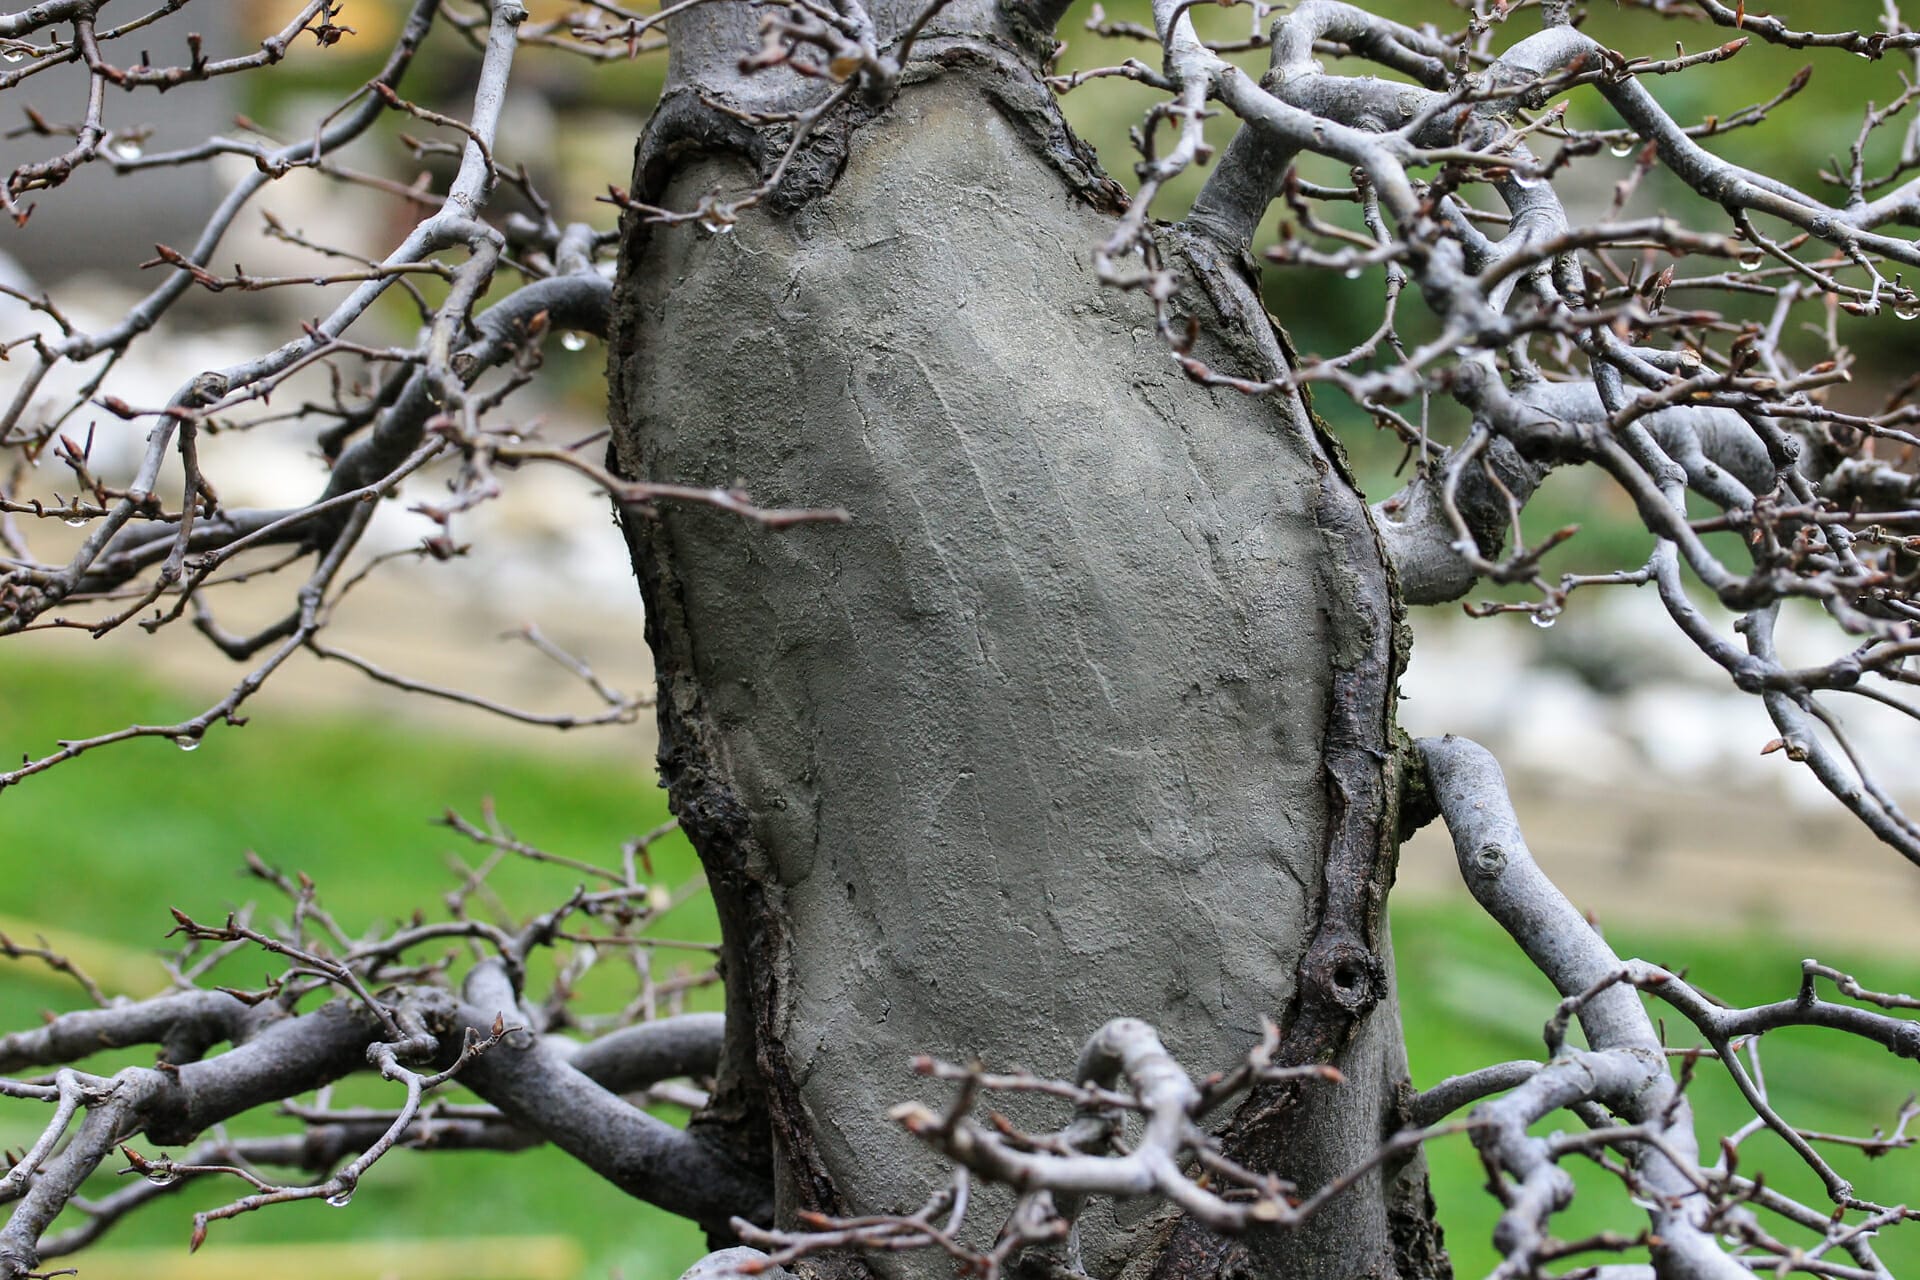
To solve the problem, such wounds were simply "concreted over" in the old Japanese gardens. By applying a layer of cement, rotting of the woody plant and the penetration of harmful organisms can be consistently prevented. The callus below the cement layer also has the chance to spread more quickly and completely over the wound and protect the tree.

Step 1
1

Important: Sealing with varnish balm or wound paste would no longer be sufficient to ensure long-term protection.

Step 2
2

The first step is to thoroughly remove any rotten wood. To do this, we use a milling machine.

Step 3
3

Once the wound has been thoroughly cleaned, we create a stabilizing base for the subsequent cement layer. We place a few screws over the wound and then connect them with wire to form a net. The wound must now be sprayed with a protective agent against insects and fungi.

Step 4
4

This step involves the actual sealing with cement. Conventional cement can be used for this purpose, but simple tile adhesive can also be used. This has the advantage of being flexible and frost-proof.

Step 5
5

Do not be too sparing when applying the cement or tile adhesive. The protective layer must be at least five millimeters thick.

Step 6
6

Here you can see the finished hornbeam.

See also: